DIY Window Cleaning Tips
Keeping your windows sparkling is not just about aesthetics; clean windows can enhance the amount of light that enters your home and improve your mood. Here’s a comprehensive guide to do-it-yourself window cleaning, followed by a recommendation for those who prefer professional help.
Gather Your Supplies
Before embarking on your window cleaning project, it’s essential to ensure you have all the right tools and materials. Here’s a comprehensive list of what you’ll need:
Bucket:
Choose a large enough bucket to mix your cleaning solution and to easily dip a squeegee or scrubber.
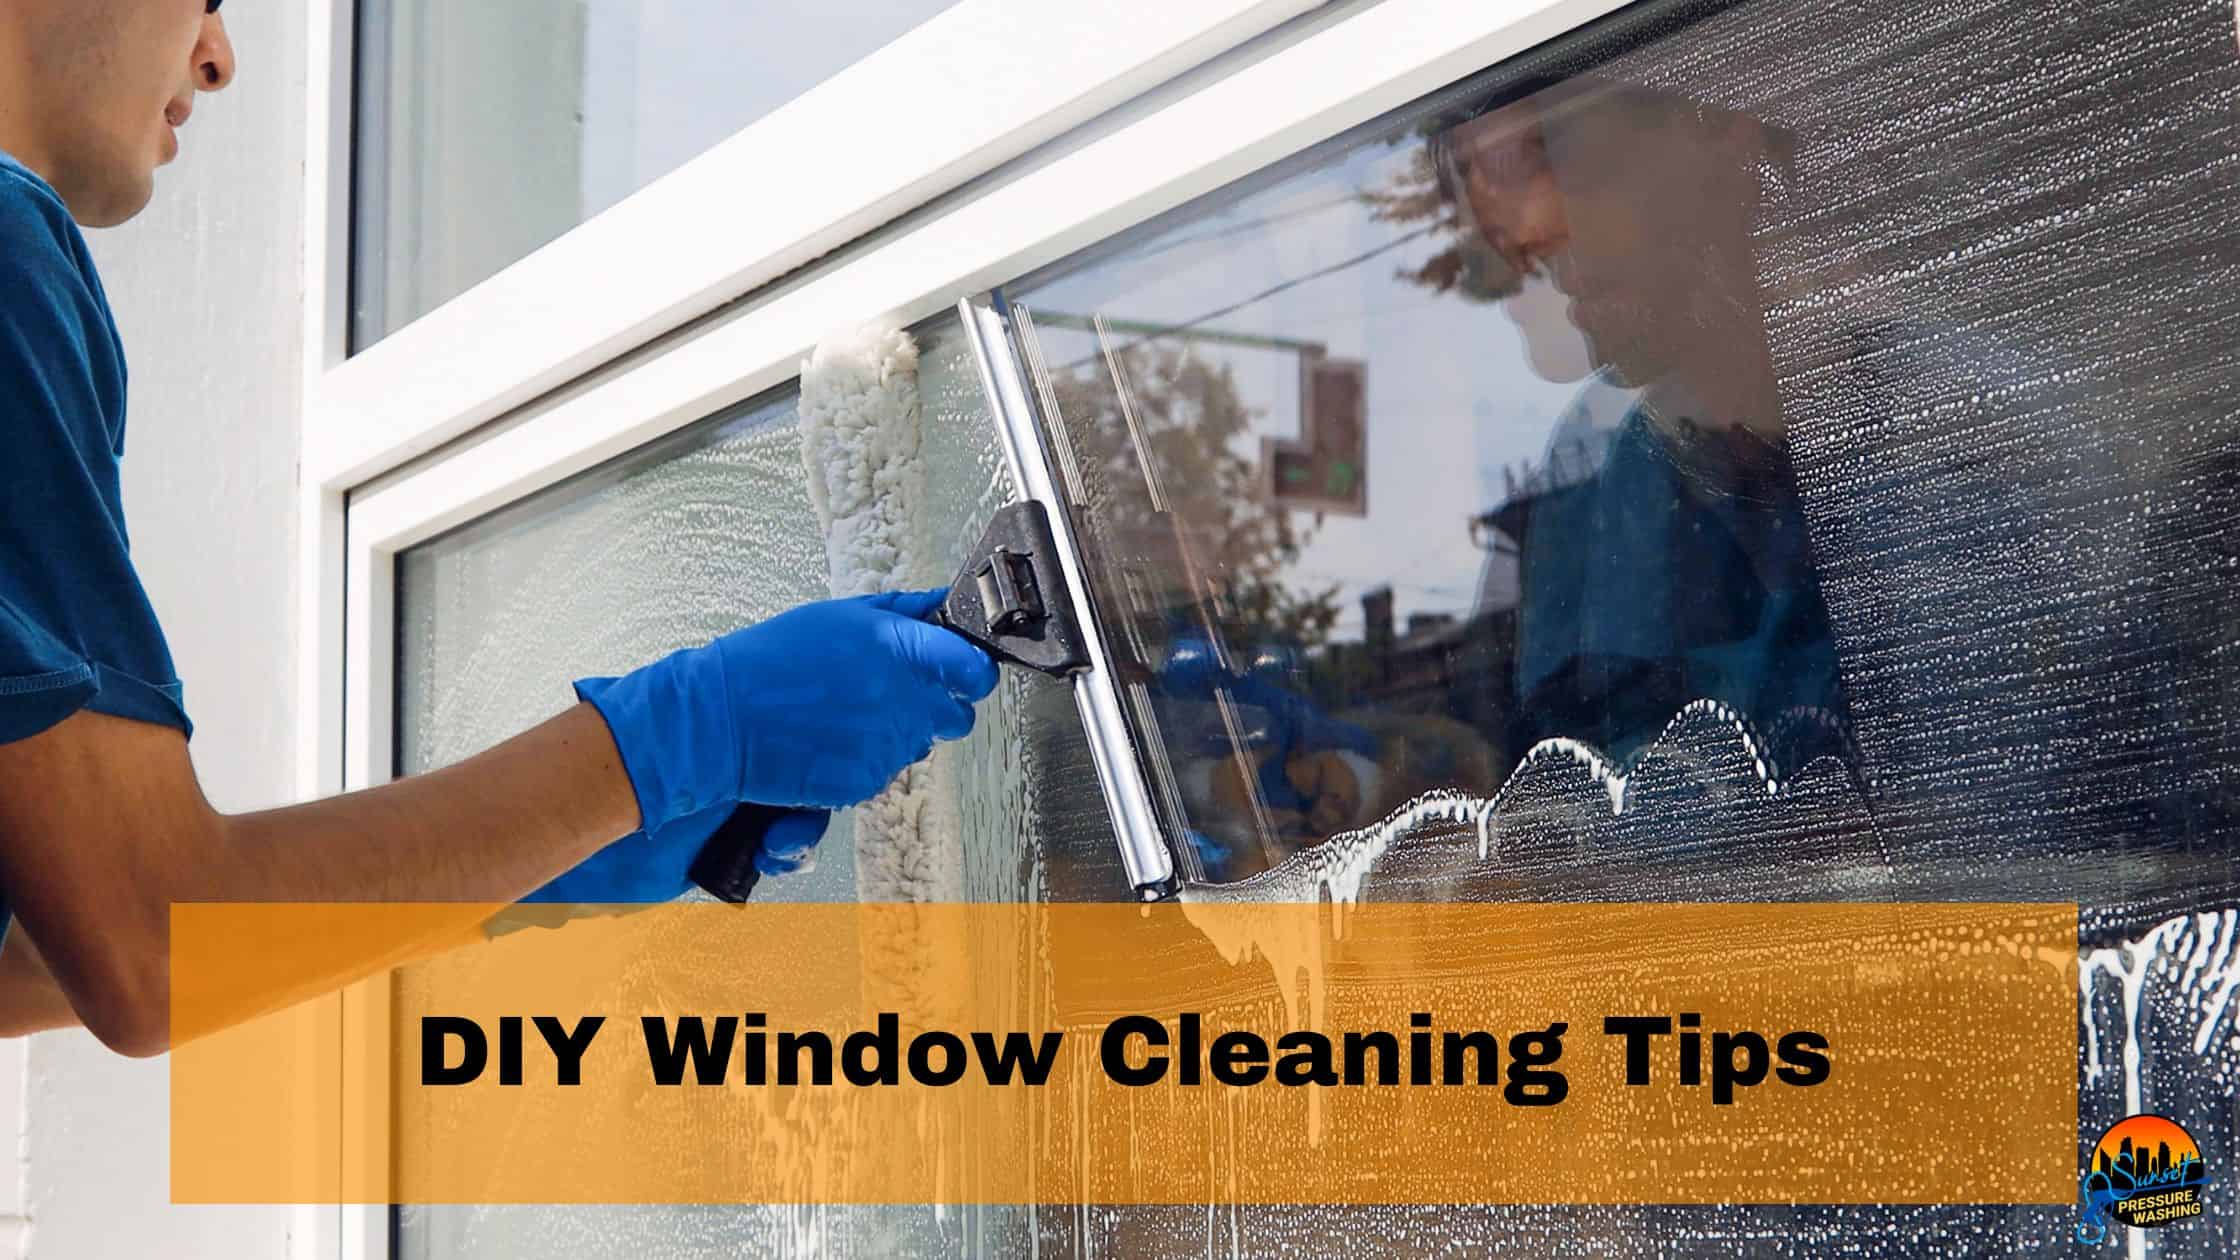
Squeegee:
This is a key tool for streak-free windows. A good quality squeegee with a sharp, firm rubber blade is vital.
Microfiber Cloths or Newspaper:
Microfiber cloths are excellent for wiping and polishing the glass without leaving lint. Old newspapers are a traditional choice for a streak-free shine.
Rubber Gloves:
Protect your hands from the cleaning solution, especially if you have sensitive skin or if using stronger cleaning agents.
Window Cleaning Solution:
You can opt for a commercial cleaner or make your own with household items like vinegar or dish soap.
Ladder:
If you have windows that are out of reach, a stable ladder is necessary. Ensure it’s in good condition and safe to use.
Sponge or Scrubber:
A sponge is great for applying the cleaning solution to the windows. For more stubborn grime, a scrubber can be useful.
Extension Pole (optional):
If you’re dealing with very high windows, an extension pole for your squeegee and scrubber can be a back-saver.
Plastic Bucket-on-a-Belt (optional):
This is handy for professional window cleaners, but can also be useful for DIY enthusiasts. It holds your squeegee, scrubber, and cloths, and attaches to your belt for easy access.
White Vinegar (for homemade solution):
If you prefer a natural cleaner, white vinegar is a great choice. It’s effective, economical, and eco-friendly.
Distilled Water (for homemade solution):
Using distilled water in your homemade cleaning solution can prevent streaks caused by minerals in tap water.
Choose the Right Time
Timing is a crucial factor in achieving streak-free windows. Picking the right time of day and the right weather conditions can make a significant difference in your window cleaning experience and results.
Avoid Direct Sunlight:
This is the most important rule. Cleaning windows in direct sunlight can cause the cleaning solution to dry too quickly, leading to streaks and spots. The sun’s heat can also make the glass surface hot, which increases the rate of evaporation.
Ideal Time of Day:
Aim for early morning or late afternoon when the sun is not as intense. Overcast days can also be perfect for window cleaning, as the lack of direct sunlight reduces streaking.
Temperature Matters:
Moderate temperatures are ideal. If it’s too hot, the cleaning solution dries too quickly. If it’s too cold, the solution can freeze on the windows, making it difficult to clean effectively.
Avoid Rainy Days:
Although it might seem like a good idea to let nature help with the rinse, rain can undo your cleaning efforts, especially if it starts raining before the windows have dried completely.
Check the Wind:
A windy day can cause dust and debris to stick to the cleaning solution before it dries, making your windows dirty again.
Plan for Safety:
If you’re using a ladder, avoid windy or wet days as these conditions can make it unsafe.
Regular Maintenance:
If you clean your windows regularly, choosing the right time will become a natural part of your routine, ensuring consistently clear and streak-free windows.
Homemade Cleaning Solutions
While there are numerous commercial window cleaning solutions available, making your own at home can be just as effective, economical, and eco-friendly. Here are some tried-and-true recipes for homemade window cleaners:
Vinegar and Water Solution:
- Ingredients: Equal parts of distilled white vinegar and water.
- Method: Mix in a spray bottle or bucket. This solution works well for cutting through grease and leaving a streak-free finish. The vinegar smell dissipates quickly once the windows dry.
Dish Soap and Water:
- Ingredients: A few drops of liquid dish detergent mixed with a bucket of warm water.
- Method: The soap helps to lift dirt and grime, making it easy to wipe away. Be careful not to use too much soap, as it can leave residue.
Ammonia and Rubbing Alcohol Solution:
- Ingredients: One tablespoon of clear ammonia and one-half cup of rubbing alcohol per gallon of water.
- Method: This is a stronger solution for more stubborn grime. Ammonia cuts through heavy soil and grease, while alcohol helps the solution to evaporate quickly, reducing streaks.
Cornstarch Window Cleaner:
- Ingredients: Two tablespoons of cornstarch, half a cup of white vinegar, half a cup of rubbing alcohol, and four cups of water.
- Method: Mix well to dissolve the cornstarch. This solution is great for outdoor windows and those with a heavy build-up of dirt.
Lemon Juice Cleaner:
- Ingredients: Two tablespoons of lemon juice, a quart of warm water.
- Method: Lemon juice acts as a natural degreaser and leaves a pleasant, fresh scent.
Tips for Using Homemade Solutions:
- Use Distilled Water: Especially in areas with hard water, using distilled water can prevent mineral deposits on your windows.
- Label Spray Bottles: If you’re mixing solutions in spray bottles, label them clearly to avoid confusion.
- Test First: If you’re using a new solution, test it on a small window area first to ensure it doesn’t leave residue or damage the surface.
- Use a Microfiber Cloth or Squeegee: For best results, use these tools to apply and remove the cleaning solution.
The Cleaning Process
Cleaning your windows effectively involves more than just wiping them down. Following a systematic process ensures that your windows are not only clean but also free from streaks and residue. Here’s a step-by-step guide:
Prepare the Area:
- Remove Curtains or Blinds: Clear the area around the windows. Remove any curtains, blinds, or window treatments to prevent them from getting wet or damaged.
- Dust Off: Use a dry cloth or a brush to dust off the frame and the sill. This prevents dirt from turning into mud when wet.
Apply the Cleaning Solution:
- Using a Sponge or Cloth: Dip your sponge or cloth into the cleaning solution. Wring out excess liquid to avoid dripping.
- Apply to Window: Start at the top of the window and work your way down in an S-pattern. This ensures coverage of the entire surface.
Scrub the Window:
- Tackle Stubborn Spots: For spots with built-up grime, use a little extra pressure or a window-safe scrubbing tool.
- Be Gentle: Avoid using harsh abrasive tools that can scratch the glass.
Squeegee the Window:
- Top to Bottom: Starting at the top corner, drag the squeegee across the window horizontally, then move down vertically, slightly overlapping the previous stroke.
- Wipe the Blade: After each stroke, wipe the squeegee blade with a clean cloth to prevent streaking.
Inspect for Streaks:
- Final Check: Step back and inspect the windows from different angles to check for streaks or missed spots.
- Touch-Up: Use a clean, dry microfiber cloth for any necessary touch-ups.
Additional Tips:
- Avoid Paper Towels: They can leave lint and residue. Opt for a squeegee or microfiber cloth instead.
- Clean Regularly: Regular cleaning prevents the build-up of tough grime, making the cleaning process easier.
- Safety First: For higher windows, use a ladder safely or consider an extension pole for your squeegee and sponge.
Squeegee Technique
Mastering the squeegee technique is key to achieving streak-free, professionally cleaned windows. It might take a bit of practice, but once you get the hang of it, you’ll notice a significant difference in your window cleaning results. Here’s how to use a squeegee effectively:
Choose the Right Squeegee:
- Quality Matters: Invest in a good quality squeegee with a sharp, flexible rubber blade.
- Size Appropriately: The squeegee should be the right size for your windows. A 12 to 14-inch squeegee is suitable for most home windows.
Wet the Window:
Before using the squeegee, make sure the window is wet with your cleaning solution. This helps the squeegee glide smoothly and prevents skipping.
Starting Position:
Place the squeegee at the top corner of the window. For right-handed people, start at the top left corner; for left-handed, start at the top right.
Pull Across or Down:
- Horizontal Strokes: Pull the squeegee across the window horizontally, holding it at an angle. The angle helps channel the water down.
- Vertical Strokes: Alternatively, you can use vertical strokes, starting from the top and moving down. This method is often preferred for tall, narrow windows.
Wipe the Blade:
After each stroke, wipe the squeegee blade with a clean, lint-free cloth. This prevents streaking and ensures a clean swipe on each pass.
Finish at the Edges:
Pay special attention to the edges and corners of the window. These areas often require a bit more precision.
Dry the Edges:
After squeegeeing, use a clean microfiber cloth or chamois to dry the edges and corners where water can accumulate.
Regular Blade Maintenance:
Inspect and replace the squeegee blade when it becomes dull or nicked. A damaged blade will not clean effectively and can leave streaks.
Practice and Patience:
If you’re new to using a squeegee, practice is key. Be patient and give yourself time to learn the technique.
Additional Tips:
- Angle Adjustments: Adjust the angle of the squeegee depending on whether you’re moving horizontally or vertically.
- Pressure: Apply consistent, even pressure throughout each stroke.
- Safety First: For high windows, use a ladder safely or consider an extension pole for your squeegee.
Wipe Off Excess Water
After using a squeegee, it’s important to properly handle the excess water to ensure a clean, streak-free finish. Here’s how to effectively wipe off excess water from your windows:
Use the Right Cloth:
- Microfiber Cloths: These are highly recommended as they are super absorbent, lint-free, and leave no streaks.
- Chamois or Squeegee Cloth: These specialized cloths are also effective in absorbing water without leaving residue.
Start at the Edges:
Begin by wiping the edges of the window. These areas often accumulate water that the squeegee can’t reach. Fold your cloth to a dry section if it gets too damp.
Detail the Corners:
Use a dry corner of the cloth or a cotton swab to absorb water from the corners, where moisture tends to gather.
Wipe the Window Sill:
Don’t forget to dry the window sill, especially if it’s made of wood, to prevent water damage or mold growth.
Check for Streaks:
After wiping, stand back and examine the window from different angles for any streaks or missed spots. If you find streaks, lightly dampen one side of your cloth with clean water and gently wipe the streak, then dry with the other side of the cloth.
Regularly Change Cloths:
Use a fresh cloth if the one you’re using becomes too wet. A saturated cloth won’t effectively absorb water and can leave streaks.
Buff the Glass:
For an extra shine, give the window a final buff with a dry, clean microfiber cloth. This will leave the glass sparkling and clear.
Additional Tips:
- Avoid Paper Towels and Old Rags: These can leave lint or residue on the glass, marring your cleaning efforts.
- Dry Immediately After Squeegeeing: Don’t let the water sit for too long after using the squeegee, as this can lead to water spots.
- Use a Separate Cloth for Frames: If your window frames are dirty, use a different cloth to clean them to avoid transferring dirt onto the glass.
Cleaning Window Screens
Window screens are often overlooked, but they play a vital role in keeping out dust, insects, and debris. Cleaning them is just as important as cleaning the glass. Here’s how to effectively clean your window screens:
Remove the Screens:
Carefully remove the screens from the window. If you’re not sure how, consult your window’s user manual to avoid damaging them.
Prepare Your Cleaning Area:
Choose a flat area, like your yard or driveway. Lay down a tarp or old towel to protect the screen and the cleaning surface.
Dust Off the Screens:
Gently dust the screens with a soft brush or a hand vacuum with a brush attachment to remove loose dirt and debris.
Prepare a Gentle Cleaning Solution:
Mix a mild detergent with warm water in a bucket. You don’t need a strong cleaner; a gentle soap will suffice.
Gently Scrub the Screens:
Use a soft brush or a non-abrasive sponge to gently scrub both sides of the screen with the soapy water. Be gentle to avoid bending or damaging the screen.
Rinse Thoroughly:
Gently rinse the screens with a hose on a low setting, or use a bucket of clean water. Make sure all the soap and dirt are washed away.
Dry the Screens:
Allow the screens to air dry completely before re-installing them. You can lean them against a wall in a sunny area to speed up the drying process.
Check for Repairs:
Before re-installing, inspect each screen for any damage, such as tears or holes. Minor damage can often be repaired with a screen repair kit from a hardware store.
Safety First
When cleaning windows, especially those that are high or hard to reach, safety should always be your top priority. Here are essential safety tips to ensure that your window cleaning experience is both effective and secure:
Use Ladders Correctly:
When cleaning windows, especially those that are high or hard to reach, safety should always be your top priority. Here are essential safety tips to ensure that your window cleaning experience is both effective and secure:
Don’t Overreach:
Avoid leaning too far to the sides while on a ladder. Keep your waist between the rails and move the ladder when necessary.
Use Safety Harnesses for High Places:
For very high windows, consider using a safety harness or rope and belt system for added security.
Be Aware of Your Surroundings:
Stay mindful of your surroundings to avoid accidentally knocking over objects, stepping off the ladder incorrectly, or coming into contact with electrical wires.
Don’t Rush:
Take your time with each step of the cleaning process. Rushing increases the likelihood of accidents.
Know Your Limits:
If a window is too high or difficult to reach safely, don’t risk it. Consider hiring professional window cleaners for these challenging areas.
Regular Maintenance:
Regularly maintain your window cleaning tools and equipment to ensure they are safe and effective.
Additional Precautions:
- Weather Conditions: Avoid cleaning windows in inclement weather, such as high winds, rain, or thunderstorms.
- Physical Fitness: Ensure you are physically up to the task, especially when climbing or reaching.
- Emergency Plan: Have a phone within reach in case of an emergency, and let someone know you’ll be working on the windows.
Regular Maintenance
Maintaining your windows regularly is key to prolonging their lifespan and ensuring they always look their best. Regular maintenance not only keeps windows sparkling but also helps identify and address any potential issues before they become major problems. Here’s a guide to effective window maintenance:
Clean Windows Regularly:
Depending on your environment, windows should be cleaned every 2-6 months. Areas with more dust or pollution may require more frequent cleaning.
Inspect for Damage:
Each time you clean, inspect windows for signs of damage like cracks, chips, or rotting frames. Early detection can save on costly repairs later.
Check the Seals and Caulking:
Look for any gaps or cracks in the seals and caulking around the window. These can lead to drafts and increased energy bills. Re-caulk as necessary.
Monitor for Moisture:
Dirt and debris can accumulate in tracks and frames, making windows difficult to open and close. Clean these areas regularly.
Lubricate Moving Parts:
Hinges, tracks, and rollers should be lubricated annually to ensure smooth operation. Use a silicone-based lubricant as it won’t attract dirt.
Repair or Replace Damaged Screens:
Inspect screens for holes or tears. Small damages can be patched, but significant tears might require screen replacement.
Protect from Extreme Weather:
In areas with harsh weather conditions, consider adding weather stripping or storm windows for extra protection.
Additional Considerations:
- Mind the Aesthetics: Clean windows can dramatically improve the look of your home, both from the inside and outside.
- Health Benefits: Regular cleaning eliminates allergens and dust, contributing to a healthier indoor environment.
- Safety Checks: During regular maintenance, it’s also a good time to check the security of your windows, ensuring locks and alarms are functioning correctly.
Addressing Stubborn Stains
Even with regular cleaning, windows can accumulate stubborn stains that are difficult to remove. These can be caused by hard water, mineral deposits, bird droppings, or tree sap. Here’s how to tackle these tough stains effectively:
Identify the Stain Type:
The method of removal may vary depending on the type of stain. For instance, hard water stains require a different approach than tree sap.
Use the Right Cleaning Solution:
- For Hard Water Stains: Mix vinegar with water (equal parts) and apply it to the stains. Let it sit for a few minutes before wiping off.
- For Mineral Deposits: Use a commercial mineral deposit remover, following the manufacturer’s instructions.
- For Bird Droppings and Tree Sap: Soak the area with a cleaning solution and gently scrub with a non-abrasive sponge.
Scrub Gently:
Use a non-abrasive sponge or a soft-bristled brush. Avoid harsh scrubbing, which can scratch the glass.
Use a Razor Blade for Tough Spots:
For really tough spots, carefully use a razor blade at a 45-degree angle to scrape off the residue. Do this gently to avoid scratching the glass.
Rinse Thoroughly:
After treating the stain, rinse the window thoroughly with clean water.
Regular Check-ups:
Frequently check for and address stains to prevent them from setting in and becoming harder to remove.
Protective Measures:
Consider applying a glass protectant that can repel water and prevent stains.
Avoid Abrasive Materials:
Steer clear of steel wool, harsh scrubbing pads, or abrasive cleaners, as these can permanently damage the glass surface.
Additional Tips:
- Act Quickly: The sooner you address the stain, the easier it will be to remove.
- Test Small Area First: Before applying any solution to the entire stain, test it on a small, inconspicuous area to ensure it doesn’t damage the glass.
- Safety First: If the stain is on a high or hard-to-reach window, consider your safety before attempting to remove it.
- Professional Help: For persistent stains, it may be best to seek professional assistance, especially if the stains are in difficult-to-reach areas.
When to Call in the Pros of Sunset Pressure Washing
For those challenging or time-consuming window cleaning tasks, it might be time to consider professional window cleaning services. Sunset Pressure Washing offers a comprehensive solution, tailored to your specific needs. We handle everything from interior and exterior window cleaning to tackling hard-to-reach areas like skylights. With a focus on eco-friendly methods and flexible scheduling options, their team ensures that your windows are not just clean, but also safe for your environment. We pride ourselves on providing high-quality services at competitive prices, making professional window cleaning accessible to everyone. If you’re looking for reliable, expert window cleaning services that guarantee sparkling results, consider reaching out to Sunset Pressure Washing.
Sunset Pressure Washing also places a strong emphasis on customer satisfaction. We understand that every home is unique and requires a personalized approach. Our team of skilled professionals uses state-of-the-art equipment and eco-friendly cleaning solutions, ensuring a thorough and environmentally responsible cleaning process. By choosing Sunset Pressure Washing for your window cleaning services, you’re not only ensuring pristine windows but also supporting a service that values both quality work and the wellbeing of its clients and the environment.